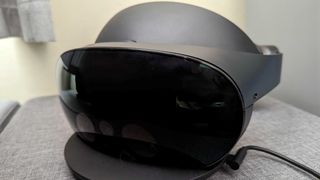
The Meta Quest Pro has access to a great suite of VR applications, but if you know how to connect your Quest Pro to a PC you can access an even larger range of programs only found on the computer.
Thankfully, it’s pretty easy to connect your Meta Quest Pro to a PC, you just need a stable internet connection (or an official Meta Quest Link cable) and to follow the steps in this guide. First things first, though, you’ll need to want to boot up your PC and install the Oculus PC app.
Steps for how to connect your Meta Quest Pro to a PC
- Download the Oculus PC app
- Turn on Air Link on your Quest Pro
- Pair your Quest Pro and PC
Tools and requirements
- Meta Quest Pro
- Oculus PC app
- A PC with a USB 3 port (optional)
- Oculus Link cable (optional)
Step by step guide for how to use Air Link
1. Download the Oculus PC app

Before you can connect your PC and Meta Quest Pro you need to download the official Oculus PC app to your computer. On the official page, scroll down to the section below Quest 2 called Air Link and Link cable and press the Download Software button.
When the file has been downloaded, find it in your Downloads folder, install it and follow the onscreen installation setup instructions.
2. Go to your Meta Quest Pro’s settings

Next, put on your Quest Pro and go to its settings. You can do this by pressing the Oculus button on your right Touch Controller to bring up the menu, then select the Quick Settings panel.
From here select System, and scroll down to find the Quest Link settings. In this sub-menu, select ‘Launch Quest Link’, which opens up a new ‘Searching for PCs’ panel. Lastly, you need to toggle on the ‘Use Air Link’ option at the top of this menu.
3. Pair your Meta Quest Pro with your PC

You should now see your PC appear in the list of possible computers to connect to. Choose your PC and then select ‘Pair,’ this should bring up a pairing code that you can see on your headset’s screen. Remove your headset to check it matches the code on your PC screen, then hit ‘Confirm’ in the desktop app.
Now press ‘Launch’ and your Meta Quest Pro will be wirelessly connected to your PC.
Step by step guide for how to use a Link cable
1. Download the Oculus PC app

As with the Air Link instructions above, your first step is to install the official Oculus PC app on your computer. To find it, scroll down to the section below Quest 2 called Air Link and Link cable and press the Download Software button.
Once the file has been downloaded open your Downloads folder to install it and follow the onscreen instructions to complete the process.
2. Plug the Link cable into your Quest Pro and PC

While the app is installing, or after, grab your Quest Pro and plug the Link cable into the headset and a USB port on your PC. Make sure it's a USB 3 port for the connection to be a high enough bitrate for the VR software you’ll be enjoying.
3. Go to the Meta Quest Pro’s settings

Next, just like with Air Link, you need to put on your Quest Pro and go into the Settings menu. You can do this by pressing the Oculus button on your right Touch Controller to bring up the menu, then select the Quick Settings panel.
From here (just like above) select System, and scroll down to find the Quest Link settings. In this sub-menu, select ‘Launch Quest Link,’ which opens up a new ‘Searching for PCs’ panel. Here, you need to toggle off the ‘Use Air Link’ option on this page.
4. Select your PC and enjoy PCVR

Once you’ve followed the above steps you should see the option to connect with your PC. Select the PC in the menu and you should be connected to it and ready to jump into the PCVR experience of your choosing.
Final thoughts
Air Link is perfect if you hate having a cable tethering you to a PC, which can restrict your movement and pull you from full immersion whenever you brush past it. However, for Air Link to work at its best you need a really good internet connection and should have your Wi-Fi router, PC, and Meta Quest Pro all in the same room to maximize the speed data can stream between the devices.
The Link cable is far more reliable than Air Link – especially if you have a dodgy internet connection – but it is less immersive. What's more, it’s costly, setting you back $79 / £89 / AU$129 on top of what you paid for the headset itself.
The cost can be worthwhile if you’re planning to play a fair few PCVR games though. While the Quest platform is full of amazing titles – which you can find out more about in our best Oculus Quest 2 games list – Steam has a great selection of experiences that you won’t find anywhere else, such as Half-Life: Alyx.

